Hydroponics Made Affordable: How to Grow Your Food Without Breaking the Bank?
I love growing my food at home. But, setting up a traditional garden can be expensive. That’s where hydroponics comes in. Hydroponics made affordable is a game-changer, offering a way to grow plants without soil, saving water, and providing fresh food all year round.
And the best part? You can create your hydroponic system without spending a fortune. With just a little DIY know-how and some effort, you can set up an efficient, cost-effective hydroponic garden at home.
Key Takeaways
- Discover the benefits of hydroponics, including efficient water usage and sustainable agriculture
- Explore six cost-effective DIY hydroponic systems that you can easily set up at home
- Learn how to optimize your system’s performance while minimizing operational costs
- Grow fresh produce and other plants without the need for traditional soil-based gardening
- Unlock the secrets to creating a thriving indoor or outdoor hydroponic garden on a budget
Understanding the Basics of Hydroponic Gardening
Hydroponic gardening is a modern technique for growing plants using water and nutrients instead of soil. Plants get nutrients from a special solution given to their roots. This method lets gardeners control things like nutrient levels and pH balance, helping plants grow well.
What Makes Hydroponics Different from Traditional Gardening
Hydroponics relies on water, rather than soil, to nourish plants. This way, plants grow faster and produce more than those in soil. They can grow up to 50% faster and make 30% more food.
Benefits of Soilless Growing Systems
- Less water needed: Hydroponics uses 70-90% less water than regular gardening.
- More produce: Plants in hydroponics grow up to 50% faster and produce 30% more.
- Grow all year: Hydroponics lets you control the growing conditions for year-round crops.
- Save space: Hydroponics can be set up vertically, making the most of small spaces.
- Less pests and diseases: Hydroponic plants face fewer problems from pests and diseases found in soil.
Key Components of Hydroponic Systems
A hydroponic system has a water reservoir, a growing tray, and a pump for water and air. It also has air stones, net pots, a growing medium, and a special nutrient solution. These parts work together to give plants what they need to grow well without soil.
Hydroponic gardening is a green and efficient way to grow food, unlike traditional gardening. It opens up new chances for growing healthy, nutrient-rich crops, even in small spaces. By learning about hydroponics, gardeners can start growing their own food in new and exciting ways.
Essential Materials and Equipment for DIY Hydroponics
Starting your DIY hydroponic project needs the right stuff. These items help your plants grow well. Here’s what you’ll need to begin:
- Reservoir ($20-$40): This holds the water solution full of nutrients, the base of your system.
- Grow Tray ($15-$30): Where your plants sit, letting their roots get the water they need.
- Water Pump ($20-$40): Moves the nutrient solution, keeping your plants fed.
- Air Pump and Stones ($40-$55): Together, they add oxygen to the water, vital for your plants.
- Net Pots ($5-$10 for 6-8 pots): Holds your plants, letting their roots reach the solution.
- Growing Medium ($10-$20): Supports and aerates your plants’ roots, like clay pebbles or coco coir.
- Nutrients ($20-$30): Gives your plants the minerals and vitamins they need to grow.
- pH Meters and Adjusters ($20-$40): Keeps the solution’s pH right, key for plant health.
- Grow Lights ($100-$200 for a 1000W LED): Needed for indoor growing, to light your plants.
- Grow Tents ($100-$150): Creates a safe space for your plants, away from outside harm.
- Timers ($10-$20): Helps automate care, like lighting and watering, for your plants.
- Ventilation Systems: Keeps air moving, preventing mold and disease in your system.
With these key items, you’re ready to start a DIY hydroponic system. Enjoy growing your own food and plants indoors.
“Hydroponic gardening allows you to grow a variety of plants, including herbs, vegetables, and flowers, without the need for soil. With the right gear, you can make a system that gives you lots of food.”
Hydroponics Made Affordable: Breaking Down the Costs
If you’re watching your budget and thinking about hydroponics, you’re in luck. Cost-effective solutions are available. The upfront costs for a DIY hydroponic system might look high, but the long-term savings are worth it.
Initial Setup Expenses
Setting up a basic DIY hydroponic system can cost between $500 and $800. This includes grow trays, air pumps, and grow lights. Compared to traditional gardening, which costs $400 to $600, hydroponics might seem pricier at first. But, the benefits are big.
Monthly Operating Costs
Monthly, hydroponics can save you money compared to traditional gardening. The electricity for pumps and lights costs $50 to $100 a month. Nutrient solutions cost $15 to $20 monthly. Plus, hydroponics uses water very efficiently, keeping your water bill low.
Cost Comparison with Traditional Gardening
Though hydroponics starts with a higher cost, it saves money in the long run. Traditional gardening needs soil, seeds, and tools, which add up fast. Hydroponics also offers higher yields and faster growth, making it more cost-effective.
By looking at the costs of setup and monthly expenses, you can enjoy hydroponics made affordable. You’ll get a thriving, cost-effective and efficient water usage garden.
Deep Water Culture (DWC) System Setup
Starting with hydroponics? The Deep Water Culture (DWC) is a great choice for beginners. It keeps plants’ roots in a nutrient-rich solution, no soil needed.
You’ll need a few things to start: a reservoir, an air pump, an air stone, net pots, and a growing medium. The reservoir holds the water with nutrients. The air pump and air stone add oxygen, preventing root rot.
For the growing medium, you can use Rockwool, expanded clay pebbles, or coconut coir. Net pots support your plants, letting their roots reach the solution.
| Item | Cost |
|---|---|
| 25lb kit of Masterblend nutrients | $60 |
| pH down solution | Varies |
| pH and PPM testers | Varies |
| Southern Ag Garden Friendly Fungicide | Varies |
| Net cups | Varies |
| Air pump | Varies |
DWC systems are easy to care for. They prevent root rot by keeping the solution oxygenated. With the right setup, you can grow a lot of plants with little work.
Success in DWC depends on good water quality, nutrient levels, and pH balance. Monitor these closely to create a thriving, soilless growing space. This will give you a steady and plentiful harvest.
Nutrient Film Technique (NFT) on a Budget
The Nutrient Film Technique (NFT) is a well-liked hydroponic method. It’s efficient, simple, and keeps nutrients flowing to plant roots. You can make a budget-friendly NFT system. This lets you enjoy the benefits of soilless gardening without spending a lot.
Building Your NFT System
To make an NFT system on a budget, use materials like PVC pipes or gutters. These should be safe for food, resistant to UV, and strong. You’ll also need a small water pump, a reservoir for the nutrient solution, and some plumbing parts to connect everything.
Material Selection Tips
- Choose PVC pipes or gutters for the growing channels. Make sure they’re safe for food and UV-resistant.
- Pick a water pump that fits your system size. It should move about 200 to 300 gallons per hour (GPH).
- Find a reservoir, tubing, and plumbing fittings that match your channels and pump.
Maintenance Requirements
Keeping your NFT system in good shape is key. You’ll need to:
- Clean the channels to stop algae or mineral buildup.
- Check the nutrient solution levels and add more as needed.
- Make sure the flow rate and channel slope are right for good nutrient spread.
By following these tips, you can build a cost-effective NFT system. It will help you grow plants sustainably and use water wisely.
“Hydroponics can accelerate plant growth by up to 25% and increase yields by up to 30%, while using significantly less water compared to traditional soil-based methods.”
Wick System: The Simplest DIY Solution
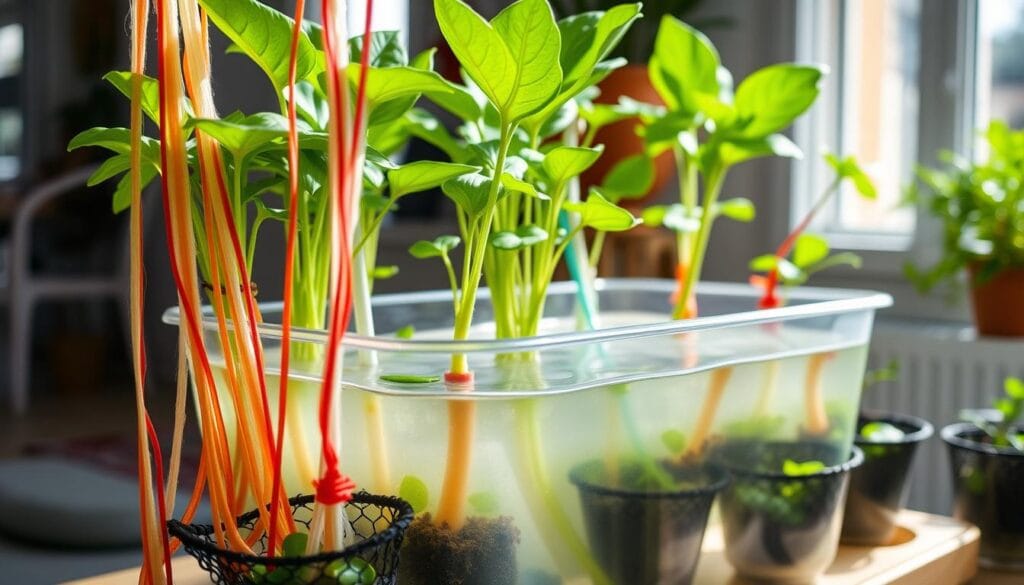
If you’re on a tight budget but keen to dive into the world of hydroponics, the wick system is your ideal entry point. This simple and affordable method is perfect for beginner indoor gardeners looking to grow plants without soil. It uses a wick to transport a nutrient-rich solution from a reservoir to the plant roots, making it a passive, low-maintenance system that doesn’t require electricity or pumps.
The beauty of the wick system is in its simplicity and ease of setup. All you need are a few basic materials: a container, wicking material (such as cotton rope or felt), a growing medium, and nutrient solution. This straightforward system allows you to create a self-sustaining hydroponic garden right in your own home, without the complexity of more advanced setups.
One of the primary benefits of the wick system is its affordability, making it an accessible option for both beginners and budget-conscious growers. By eliminating the need for costly equipment, you can enjoy the benefits of hydroponics on a budget-friendly scale. Additionally, the simplicity of the wick system means minimal upkeep, making it an ideal choice for beginner indoor gardeners or those with limited time to devote to their hydroponic endeavors.
When it comes to materials, common wicking choices include absorbent cotton or nylon fibers. These materials effectively transport the nutrient solution from the reservoir to the plant roots, ensuring a steady supply of essential nutrients. As your plants grow larger, the wicks will naturally draw more solution, showcasing the scalability of this system to accommodate your gardening needs.
However, it’s important to note that wick systems may face some challenges, such as the potential for wicks to become clogged or the risk of root rot if the growing medium is not properly aerated. Regularly monitoring the cleanliness and condition of your wicks is crucial to maintaining a thriving hydroponic garden.
To set up a wick system, you’ll need the following supplies:
- A container or pot for the plant
- A reservoir to hold the nutrient solution
- Wicking material (cotton rope or felt)
- Growing medium (e.g., coco coir, perlite, vermiculite)
- Nutrient solution formulated for hydroponics
The setup process involves arranging the wicks in the reservoir, filling the plant container with the growing medium, and planting your seeds or seedlings. With a few simple steps, you can have a DIY hydroponic system up and running in no time.

So, if you’re looking for an affordable and beginner-friendly way to venture into the world of hydroponics, the wick system is an excellent choice. Its simplicity, low cost, and minimal maintenance make it an ideal solution for indoor gardening enthusiasts on a tight budget.
Creating an Efficient Drip System
Hydroponic gardening is an efficient and innovative way to grow your food. The drip system is a top choice. It sends water and nutrients straight to the roots, cutting down on waste and boosting growth.
Components Required
To build a drip system, you need a few things. A reservoir for the nutrient solution, a submersible pump, and tubing to move the solution. You also need drip emitters to get the water to the roots. A timer might be useful for setting a watering schedule.
Assembly Instructions
- First, connect the pump to the water line. Make sure it’s secure and won’t leak.
- Measure and cut the tubing. Then, attach it to the pump and the drip emitters.
- Place the drip emitters close to the plants’ roots. This ensures the solution gets to where it’s needed.
- If you have a timer, set it to water at the best times. Consider the plant type and its growth stage.
Optimization Tips
- Use pressure-compensating emitters for steady water flow. This works even if the pump is far from the plants.
- Think about a recirculating design to save water and nutrients. This can lower your costs.
- Adjust the drip rate to fit your plants’ needs. This ensures they get the right amount of moisture and nutrients.
By following these steps and tips, you can make a drip system that’s efficient and cost-effective. You’ll enjoy higher yields, use less water, and have a greener growing space.
Water and Nutrient Management for Cost Efficiency
Managing water and nutrients well is key to saving money in hydroponic gardening. Use a pH meter to keep the pH between 5.5 and 6.5. This range is best for plant growth and nutrient absorption. Pick top-notch hydroponic nutrients and stick to the dosage to give your plants the right mix of minerals.
To save water and lower costs, set up a water recycling system. This way, you can reuse the nutrient solution, needing less new water and nutrients. Additionally, make sure to monitor the electrical conductivity (EC) levels in your system. Adjust as necessary to keep the nutrient concentration just right.
| Metric | Benefit | Statistic |
|---|---|---|
| Water Usage | Efficient water usage | Hydroponics uses up to 80% less water than conventional farming. |
| Plant Growth | Faster growth | Plants grown in hydroponics can grow up to three times faster than conventionally grown plants. |
| Nutrient Management | Accurate adjustments | Previous research showed an 80% correlation between the proposed system and the traditional method of measuring electrical conductivity of nutrients. |
By using these water and nutrient management tips, you can cut down on your hydroponic gardening costs. Plus, you’ll be supporting sustainable agriculture practices.

“Hydroponics is revolutionizing food production by enabling more efficient and sustainable growing practices. The ability to precisely control water and nutrients can dramatically improve yields while conserving precious resources.”
Light Solutions for Indoor Hydroponic Systems
For indoor hydroponic systems, the right light is key. LED grow lights are popular for their energy use and long life. They’re a green choice compared to old lights.
LED vs. Traditional Lighting Options
LED grow lights copy sunlight’s full spectrum. This helps plants grow well. They use less power and make less heat than old lights, saving money.
LEDs cost more at first, but they save money in the long run. Pick the right LED lights to make sure your plants get the best light.
Energy-Saving Strategies
- Use timers to control when your grow lights are on. This ensures plants get the right light.
- Change the light’s strength as plants grow. More light when they’re young, less when they’re fruiting.
- Use natural light by placing your garden near windows. This cuts down on artificial light needs.
These tips help your hydroponic systems use less energy. This saves money and is better for the planet.
| Lighting Option | Energy Efficiency | Lifespan | Cost-Effectiveness |
|---|---|---|---|
| LED Grow Lights | High | Long (50,000+ hours) | Excellent |
| HID Lights | Moderate | Medium (20,000-30,000 hours) | Good |
| Fluorescent Lights | Low | Short (10,000-20,000 hours) | Fair |
Choosing and using your lights wisely makes a great indoor gardening space. It’s also beneficial for both your wallet and the environment.
Troubleshooting Common Issues in DIY Systems
Starting a diy hydroponics project can be both fun and tough. You’ll face some common problems in hydroponic gardening and soilless growing. By being quick to solve these issues, you can keep your diy hydroponics setup healthy and productive.
Keeping the pH balance right is key in hydroponics. You should frequently monitor the pH of your nutrient solution to ensure optimal plant health. New systems might need daily checks, while more stable ones can go down to once or twice a week.
Nutrient problems like deficiencies or toxicity can also happen. These issues might come from pH imbalances, temperature changes, or wrong nutrient levels. Tracking the PPM, EC, and TDS in your solution helps keep it balanced.
Algae buildup is another common problem in hydroponic gardening. Cleaning and flushing your system every 2-3 weeks helps prevent algae. Using good LED grow lights also helps plants grow well and keeps algae away.
Leaks and system failures can happen too. Make sure to test your system well before starting. Regular monitoring and prompt adjustments help extend the lifespan and improve the performance of your soilless growing system.
Remember, fixing problems and learning new things are key in diy hydroponics. By staying informed and adapting, you can make the most of your hydroponic gardening efforts. This way, you’ll get plenty of great harvests.
“Successful hydroponic gardening demands attentiveness, patience, and a readiness to learn from both achievements and challenges.”
Conclusion
Affordable DIY hydroponic systems are great for those who want to grow plants without spending a lot. They help you learn about hydroponics and find ways to save money. This way, you can make a productive garden at home.
These systems need care to work well. But with the right steps, you can grow food all year. You’ll also save water and help the planet.
There are many DIY hydroponic methods to choose from. You can select a system that aligns with your available space and fits within your budget. This way, you get to enjoy the perks of hydroponics like fast-growing plants and less water use.
Starting with DIY hydroponics is exciting, no matter if you’re new or have experience. It’s a way to grow your own food in a green way. With some effort, you can make a garden that gives you fresh, healthy food.

